Wednesday, February 20, 2013

Nine-and-a-half shades of grey

Ah, grey. The colour du jour. The new ‘goes with anything’, sophisticated, grown-up, chic shade for adults. How I love thee.

For reasons too tedious to explain here, I had to decide on a colour scheme for an upstairs bedroom in rather a hurry. I’d been idly surfing researching colour schemes for this room (north-east facing, gets a lot of light in the morning) for some time when I came across a series of rooms, based around a grey scheme, which I loved. Backed up stuff I liked on pinterest my final decision was grey, with accents of mustard and teal. A scary choice for a novice DIYer and one I’m still not sure is correct, since the room is still incomplete.

The room itself, as with most of the rooms in our 50s semi, needed stripping back to basics and starting again. Jobs included channelling down walls in order to bury electric cables (yes, mains ones – originally feeding through to double sockets on a removeable headboard), moving the ceiling pendant to the middle of the room from in front of the window, insulating the bay window (thoroughly recommended if you get the opportunity), repairing/replacing skirting board, plastering and adding a picture rail.

Everthing apart from the plastering was done by my brilliant dad (DIY brains) and equally brilliant husband, S (DIY brawn). We hired a plasterer for the walls, which needed it after our efforts to remove the woodchip, and to skim the artex ceiling (no plasterboard, he just skimmed straight over). He was brilliant although he’s semi-retired and kept refusing my help. I gave him lots of tea but it just didn’t seem enough.

When the room was prepped, we went out and bought several shades of grey. Which turned into five. Which turned into seven. Which turned into nine and a half.


The half comes from a paper swatch sample from Crown in Petit Palais Eglise Grey. Despite dragging my despairing husband into visiting several different B&Qs and Homebases over the course of 2 months (I know), none of the stores had tester pots of this colour, athough they did stock the paint itself and had samples of the rest of the range. I put the word out that I was looking for it and in the end acquired a piece of paper, coloured in Eglise Grey, from B&Q. It would have to do.

So, here are my nine shades, minus the bit of paper, but with the added bonus of a smiley face in Crown’s City Break (“too dark”).


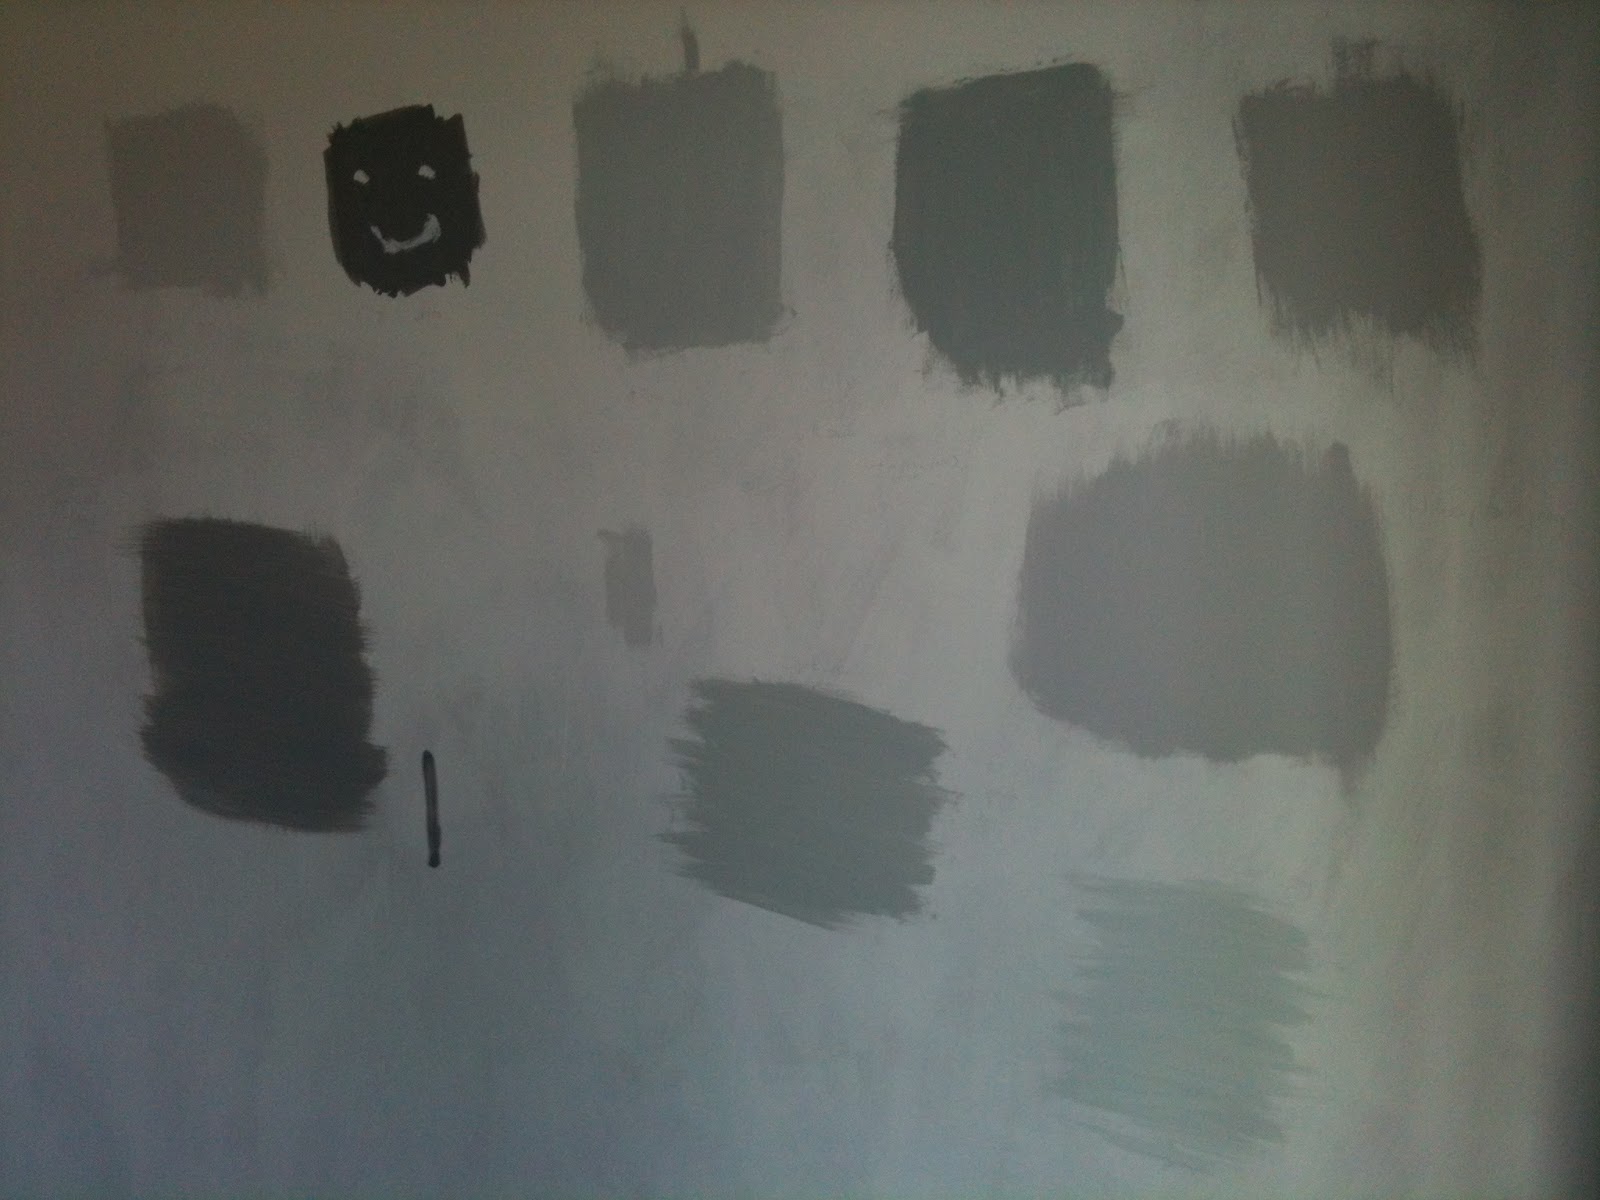
The other samples are:

  • Dulux Polished Pebble
  • Dulux Chic Shadow
  • B&Q Colours Light Rain
  • Wilko Mineral Stone
  • Wilko Pearl Grey
  • Homebase Dove Grey
  • Homebase Silver Mist
  • B&Q Cool Grey

I just couldn’t make my mind up. Too blue and the room would look cold, too pink and my teal wouldn’t work, too pale and it wouldn’t look ‘grey’ enough, too dark would feel dungeonlike. And, of course, every colour looked different depending on where in the room it was placed and what time of day it was. So I did what any sane person would do. I made S stand against each and every blob of paint (on all five bits of wall we painted patches on to) holding my small swatch of fabric up against it. For several weeks.

I don’t have a picture of him doing this, sadly, but I do have a picture of the fabric.


After much deliberation we narrowed down the choice to Polished Pebble and Chic Shadow, with Chic Shadow just coming out on top, for being “more grey” (I was pretty obsessed by this point). I have Polished Pebble in the bank for the hall, stairs and landing, but that’s another entry.

Next job is to put up the curtain rail, which comes with its own special set of challenges.

p.s. Not wishing to waste my painstakingly chosen sample pots, in the spirit of thriftiness I’m thinking of mixing one in with some of the white value emulsion used in the downstairs toilet in order to create something like a French grey.

Saturday, February 16, 2013

Things I Learned Today pt I

Just moved into the first house I've actually owned. I have a lot of tools my dad has bought over the years in anticipation of this event, but this is the first time it's been used really.

So, here are my first experiences of DIY.

#1

Cordless drill batteries can fail.
Cordless drill chargers can also fail.

Just to add a little extra frisson, failed batteries are indistinguishable from flat batteries until you try to charge them, at which point the chargers catch fire.

If you are unsure as to whether your battery or your charger has gone, order the battery first. That way, if you were wrong, you now have two good batteries, which is useful. If you do it the other way round, like I did, you have one dead battery and two dead chargers. This is less useful.

#2

Get a head torch. Mine's from Poundland, and is made to that store's world renowned stringent QA and bulletproof construction. But it is still 8 billion times better than a hand torch, unless you're an octopus.

#3

Even the cheapo Dremel knock-offs are really handy, they'll go places you can't fit anything else.

#4 

Buy a tool box with compartments rather than one big bag, unless you enjoy lucky dips involving razor sharp chisels.

#5

Whoever installed our washing machine waste pipe was an idiot.


Thursday, January 24, 2013

Introducing A Touch o’ Paint

This blog came about when I was getting utterly fed up with working on the prep for yet another painting job. The routine of sugar-soaping and sanding was beginning to feel less like progress and more like Pandora’s box – every time I completed a stage of cleaning it revealed another job that needed doing.

What I really needed, I thought, was Before and After photos, so I could see that progress had indeed been made and that I wasn't just pointlessly scrubbing down walls for no reason. By the time I came to this conclusion it was too late to take a Before shot of the project (a downstairs toilet created from the old coal shed with 70s fake-wood panelling, a pink-tiled floor and no sink, ugh), but I'm now halfway through with undercoat on and top coats due to go on any day.

Since this paint job is only a temporary measure – at some point the plan is to move the toilet to another location – I wanted to tart up the yucky toilet walls on the cheap. I’d already ripped out some of the moulding before deciding to retain the wood panelling and just paint it (having already had fairly good results elsewhere doing this), so had to replace it with simple pine quadrant moulding. I also had to No More Nails bits of the panelling down where they had started to come away from the wall. One sheet of panelling was too tricky to repair, so I removed it to find an already-painted brick wall underneath. I filled the worst of the holes in the wall then treated it the same as the panelling.

I skipped primer (luckily the faux-wood panelling was more of an orangey-ish pine colour than mahogany and wasn’t heavily veneered) and went straight for B&Q value white undercoat. And that’s where the project stands today. Already the room feels brighter and – more importantly – cleaner.